The destination for Porosity and Surface Inspection projects using non-contact optical technology.

Middle-Man 2™ HMI
Easy to use software allows image and data storage in Quality Systems
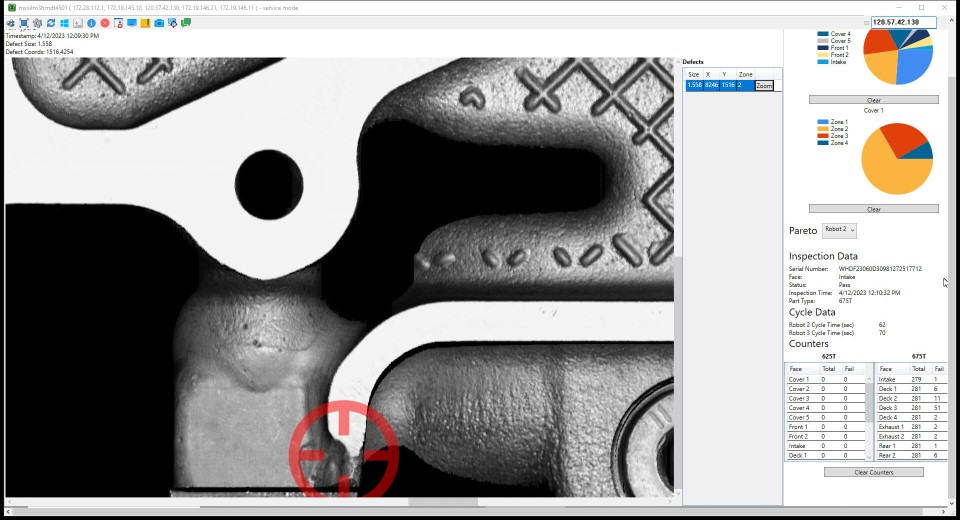
Defect Isolation Operations
More than just Porosity Isolation, Casting Variations are found.
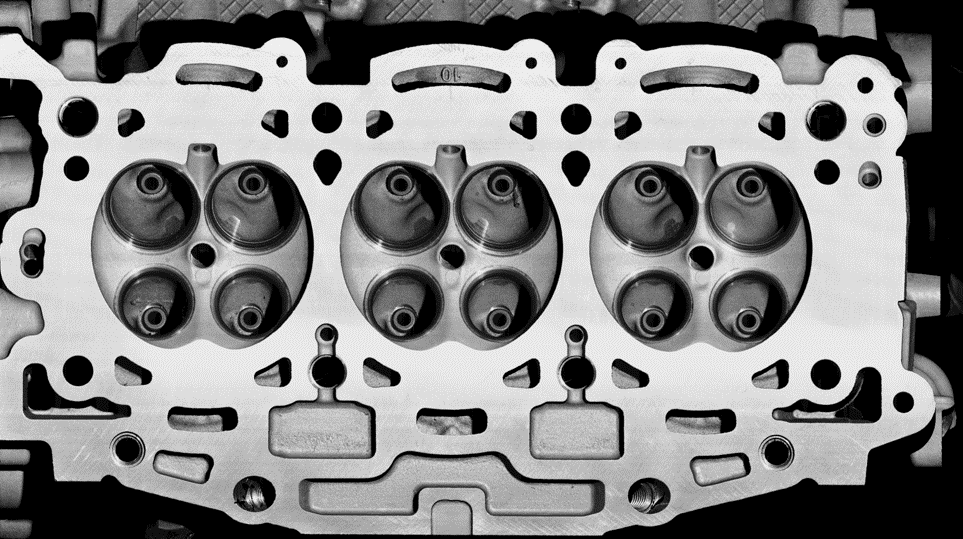
Scan one or all surfaces
High Resolution Image Scan using PVSIS from Phoenix Imaging
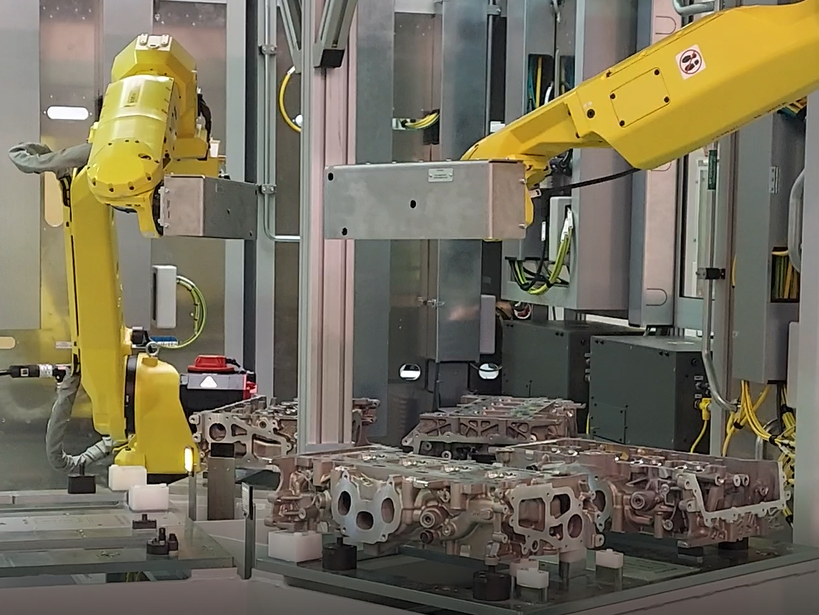
Automated Surface Inspection
Automation Partners complete the inspection cell for critical projects.
Phoenix Imaging provides real-time image and data collection for critical projects
Now Information is available about the production quality from remote locations. Your inspection personnel will never miss porosity in critical areas of your components again. The system acquires high resolution images from each assigned scan path and identifies potential defective conditions before they become a problem. The Phoenix Imaging PVSIS™ system is set up with a display in the manual inspection area. The display will indicate any surface in which a “suspect” region has been isolated and shows an image of the scanned surface with the “Suspect” region highlighted. The human inspector can then make a judgement as to accept or reject the component based on a visual investigation of the area.
The PVSIS is the solution for critical projects. The system acquires 3D cloud data and identifies porosity has having depth. Grayscale (illuminance) images are provided to the operator that indicate the position of “suspect” regions. The system allows the user (with proper access) to adjust the minimum size of defects, typical inspections isolate porosity with a 250µm diameter depending on the category of the surface.
An example of isolated defect is shown below. The “suspect” has a red circle positioned around the region.
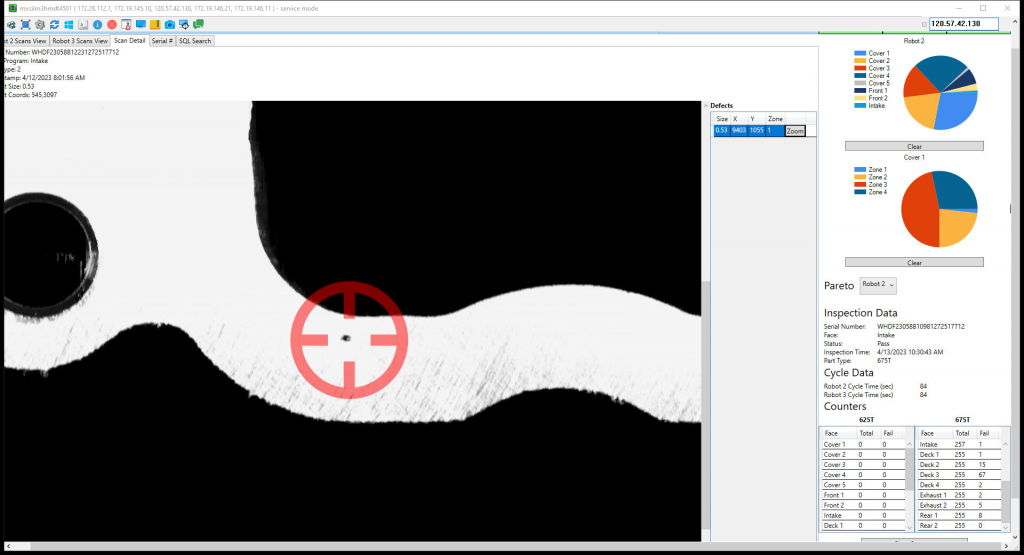
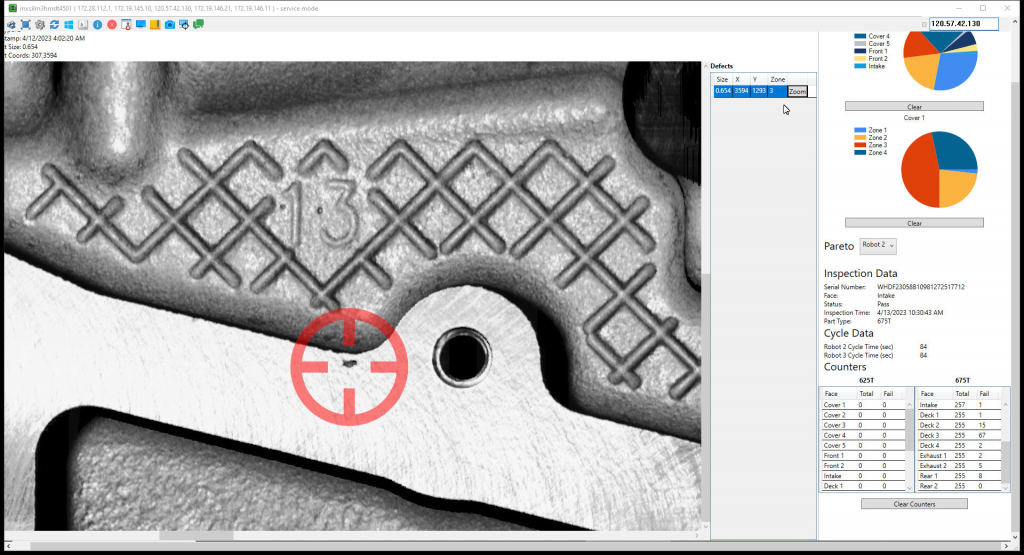
Porosity detection size is determined by the resolution of the sensor. Porosity can be as small as 50µm in major axis dimension. Typical applications will determine the sensor resolution based on the manufacturing specifications.
