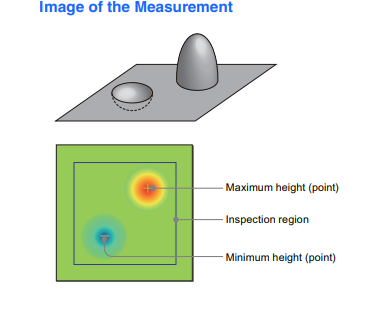
Machined metal components often expose voids in the metal structure referred to as porosity. Porosity defects are often found inside a cast metal component and pose no problem to the functionality of the component. However, if the machining process intersects one of the voids and exposes the void in a critical sealing area this may be problematic. The Phoenix Vision Surface Inspection System (referred to as PVSIS™) provides a method to scan the machined surfaces a determine if the porosity is a significant size and depth that it will cause a problem with the seal between two components. The PVSIS™ system provides high resolution surface scans in 3 Dimensions, using both grayscale (Illuminance) and height images. The system is able to identify actual porosity (defects that have depth below the scan surface) from debris that rest on the scan surface.
The scanning of the surface can be achieved by moving the sensor or moving the component. When moving the component, the sensor is held in fixed position and component is translated past the sensor. When the sensor is translated the component is held in fixed position. When the inspection requires the scanning of multiple surfaces the sensor can be mounted on the end of arm tooling of a robot.
The size of the porosity that can be detected is a function of the sensor resolution. The system works best when the resolution of the image elements (pixels) remains square. This allows the system to accurately measure size, shape and displacement between features or defects. Phoenix Imaging PVSIS™ will work with a number of image sensors but prefers to use Keyence LJ-X8000 sensors for accurate height measurements. A typical system will provide 25 to 50-micron resolution in the x & y directions and better than 5 microns in the z-direction. The images generated using either scan technique is generally very large in size. A 500 mm scan at 50µm will be 3,200 pixels wide and 10,000 lines in length and generate a grayscale image of several megabytes and a z-height image of 20 megabytes or more. The images are very large and require special image processing computers to acquire, process and analyze the images. The Keyence XG-X2902LJ is the image processor of choice and it is capable of processing these large images very quickly, a large 10,000-line image in less than 2 seconds. These images are too large to transfer over the standard factory data network for displaying the resultant images.
The Middle-Man 2 System (aka MM2™) is a computer system designed to act as the event supervisor between the line controller (PLC) and the image processing computers. The system can handle the data flow one or more image processing units working simultaneously. The MM2™ will provide instructions to the image processor, obtain inspection results and then store the acquire images (both grayscale and z-height images) for review or reprocessing. The information is presented to the operator in a format that is easily understandable. The Human Machine Interface (HMI) is displayed on a large flat panel display mounted on the front panel of the Middle-Man electrical enclosure. This interface provides current and past inspection results for each of the image processors. Defect location information is displayed on grayscale images along with defect statistics.

Phoenix Imaging prefers to use 3-D image scanning systems but has many years of experience using area-scan and line-scan sensors, from Ultraviolet to Infrared. The benefit of 3-D image scanning is that we are able to isolate image features that penetrate into the surface of an object and ignore debris on the surface. Normal imaging techniques will find features that are not of concern and cause false rejection of acceptable components.
The scanning resolution is selected to “see” surface imperfections that are often missed by human inspection. The human inspector is very good for a brief time on task and then becomes inconsistent. This is why many companies have adopted machine vision technology to provide consistent and reliable visual inspection.
Comments are closed